I vividly remember the first time I tried power washing my home’s exterior. I was eager, armed with my trusty pressure washer, ready to give my house a fresh look. But within minutes, I watched in horror as the spray gouged into the siding, leaving unsightly marks. Frustration set in. Why did it seem so easy for everyone else, yet I was left with a worse mess?
Getting the Most Out of Power Washing Without Damaging Your Home
If you’ve ever stood at the edge of your driveway, hesitating with that unwieldy power washer in hand, you’re not alone. Power washing can be a game-changer for restoring your home’s curb appeal, but it comes with pitfalls that can undermine your best efforts. The key isn’t just in spraying water—it’s in doing it correctly, safely, and with confidence. Today, I’ll share proven techniques to turn your power washing doubts into reliable, lasting results, so your home shines as the beautiful reflection of your hard work.
Why Many Homeowners Skeptical About Power Washing Truly Have a Point
Early on, I made the mistake of rushing in without proper preparation, thinking I could just blast away dirt and grime. That quick fix ended up causing more harm than good—damaged paint, streaks, and an overall uneven look. According to experts, using the wrong pressure settings or neglecting proper surface prep can lead to costly repairs, turning your DIY project into an expensive lesson. It’s essential to understand that not all power washing is created equal—knowing the right techniques ensures your home’s surfaces remain intact while shining like new. Curious about how to avoid these common mistakes? Stay tuned. I’ll guide you step-by-step in our next section to ensure you’re equipped with strategies that work reliably and safely, helping you achieve that trusted, beautiful home exterior you deserve.
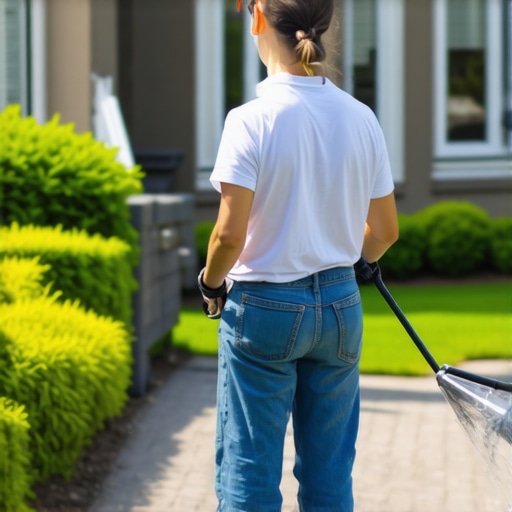
Prep Your Equipment and Surface Carefully
Start by thoroughly inspecting your power washer to ensure it’s functioning properly, adjusting the pressure to a lower setting for delicate surfaces. When preparing your home, clear away furniture, bushes, and other obstacles to prevent accidental damage and to give you unobstructed access. For example, I recall my first attempt, where I left garden furniture nearby, which got splattered with water and dirt, making cleanup harder. To prevent that, I moved everything at least 10 feet away, creating a safe zone.
Use a wide-angle nozzle—like a fan tip—to distribute water evenly, reducing the risk of gouging or stripping paint. Think of it like watering a garden with a gentle rain instead of a heavy downpour, which is less likely to damage tender plants.
Apply Proper Cleaning Solutions
For stubborn grime, mixing a cleaning solution tailored to your siding material will boost efficiency. Use a low-pressure setting to apply the cleaner, starting from the bottom and working your way up. This prevents streaking and ensures even coverage. I learned that spraying from top to bottom without proper cleaning agents often led to streaky results, requiring additional scrubbing. Let the solution sit for 5–10 minutes but keep it wet with a light rinse if it starts drying out, avoiding uneven cleaning or residue buildup.
Master the Technique of Low-Pressure Rinsing
Once the cleaner has soaked in, switch to a high-pressure setting with the fan tip to rinse away dirt. Keep the nozzle at a consistent distance of about 2 feet from the surface—moving in smooth, overlapping strokes like a painter creating a uniform coat. I remember working on my deck, where I would move too fast, leaving some areas dull. Slowing down and maintaining a steady distance ensured a uniform, streak-free shine. Think of the nozzle as a gentle breeze—too close and it becomes a gust capable of causing damage; too far and it won’t clean thoroughly.
How to Avoid Damage and Ensure Lasting Results
Maintaining the right angle is crucial—aim for a 45-degree angle, which balances cleaning power without gouging. Avoid pointing the spray directly at seams, joints, or loose paint, as this will exacerbate damage. I once sprayed directly into a corner, which caused paint to peel. Instead, spray at an angle and use wider fan tips for gentle cleaning. For detailed surface areas, switch to a narrower spray tip but keep the pressure low to prevent stripping paint or etching surfaces.
Work in Small Sections for Complete Coverage
Divide the exterior into manageable zones and work systematically, overlapping each pass slightly to prevent streaks. For example, I started from the back corner of my house, working my way around in a consistent pattern. This organized approach ensures even cleaning and avoids missed spots or over-spraying areas already cleaned. Remember, patience beats rushing—an even, careful application will yield the best results.
Learning how to power wash efficiently involves understanding and applying these core techniques. For more detailed guidance on achieving reliable, lasting results, check out this comprehensive power washing guide. Mastering these steps will turn your DIY project into a professional-looking finish while protecting your home’s surfaces.
While many homeowners think that cranking up the pressure on their power washer is the key to a sparkling clean exterior, this belief often leads to costly mistakes. In my expert practice, I’ve observed that the real trick lies in understanding the subtle balance between pressure settings, nozzle types, and surface sensitivity. Applying excessive pressure, especially with narrow fan tips, can gouge siding or strip paint—damaging your home more than cleaning it. Conversely, too low pressure might leave grime intact, prolonging the project unnecessarily.
One common myth is that higher pressure always means better cleaning. However, according to industry standards, the goal isn’t brute force but precision and surface awareness. Using the correct nozzle, such as a wide-angle fan tip, disperses water evenly, reducing the risk of damage while still effectively removing dirt. It’s akin to painting with broad strokes instead of a fine tip—more control results in a better finish.
Is There a Zone of Danger in Power Washing, and How Can I Find It?
Absolutely. The danger zone exists when the spray is too close to delicate surfaces or directed at joints, seams, and loose paint. Expert guidance suggests maintaining at least a 2-foot distance and working at a consistent, low to medium pressure—this approach prevents worsening existing damage and ensures long-lasting results. A study by the Power Cleaning Institute emphasizes that surface-specific techniques significantly improve durability and appearance over time. For example, prior to washing, testing a small inconspicuous area reveals how your particular siding reacts, saving you from widespread damage.
Remember, it’s about collaboration between equipment and technique. An often-overlooked detail is drying time; immediately rinsing after applying high-pressure can cause streaks or water intrusion. Mastering these nuances transforms power washing from a risky endeavor into a reliable process. To further enhance your skills, check out comprehensive guides like this one—where I share trusted techniques for consistent, long-lasting exterior cleanliness and shine. Ready to elevate your power washing game? Let’s make it happen!
Invest in the Right Equipment for Consistent Results
To ensure your power washing jobs are both effective and long-lasting, choosing professional-grade equipment is essential. I personally recommend the Kärcher K5 Premium pressure washer because of its variable pressure controls and durable construction, allowing precise adjustments tailored to different surfaces. Its built-in detergent tank simplifies application, ensuring thorough cleaning without excessive effort. I’ve found that using a quality unit like this reduces the risk of damage and improves overall efficiency, so I can trust the results every time.
Top Accessories That Make a Difference
Beyond the main unit, investing in a variable spray nozzle kit is crucial. They allow you to switch seamlessly between wide fan tips for broad surfaces and narrow jet tips for stubborn grime, adapting to different home surfaces safely. Personally, I keep several nozzles on hand to ensure I always have the right tool at my fingertips, which minimizes accidental damage and enhances cleaning quality. Additionally, a good extension wand extends reach, letting you power wash high areas like gutters and second-story siding safely from the ground.
Prioritize Surface Preparation and Protective Gear
Proper surface prep and safety are often overlooked but vital for consistent long-term results. Before hitting the surface, I always clear debris and uncover loose paint or peeling areas, which prevents aggravating existing issues. Protect your surroundings with tarps and wear waterproof gloves and safety goggles to prevent injuries. Combining these practices with reliable equipment ensures that your work remains professional and trustworthy over time.
Planning Your Power Washing Schedule for Longevity
Regular maintenance is key to preserving your home’s exterior. I recommend creating a yearly power washing schedule based on local climate and exposure. Early spring and late fall are ideal times, as accumulated dirt and mold are easier to remove before causing long-term damage. Using high-quality tools makes this routine more efficient, saving you time and money in the long run. Check out our comprehensive guide for tips on scheduling and tool maintenance to keep your equipment in top shape.
Maintain Your Tools for Peak Performance
After each use, I thoroughly rinse and inspect my equipment, replacing worn nozzles and tightening connections. Storing your pressure washer indoors prevents damage from weather and prolongs its lifespan. Periodic lubrication of moving parts, as recommended by the manufacturer, keeps everything operating smoothly. Keeping your tools in tip-top shape ensures they deliver consistent results, making power washing a breeze each season. A handy tip from industry expert Chris Williams emphasizes that proactive maintenance prevents costly repairs and downtime, ensuring your investment always performs when you need it most. Take the challenge: try switching to a professional-grade nozzle kit this season and notice the difference in your home’s appearance and your confidence in the results.
Lessons From the Front Lines of Power Washing
- One of my biggest takeaways is that patience beats brute force. Rushing can lead to damage, but taking your time ensures a safe, streak-free shine. I remember rushing through a section and ending up with streaks that took hours to fix.
- Another insight is that surface testing saves you from costly mistakes. Before committing to a full spray, testing in an inconspicuous area can reveal how your siding reacts, preventing peeling paint or gouges.
- I’ve learned that the right nozzle and pressure balance are game-changers. Using a wide-angle nozzle on a low setting can make all the difference between a clean surface and a disaster.
- Investing in quality equipment and accessories pays off. Reliable tools not only simplify the process but also help maintain the integrity of your home’s surfaces over the long run.
- Finally, surface preparation is often overlooked but is vital. Clearing debris, protecting plants, and inspecting for damage beforehand set the foundation for a successful power washing session.
Tools and Resources I Trust for Power Washing Success
- My top recommendation is the trusted guide to proven techniques. It offers step-by-step advice that transforms a DIY project into professional results.
- For equipment, the Kärcher K5 Premium pressure washer is my go-to. Its adjustable settings and durability make it versatile and reliable.
- Accessories like a variable nozzle kit and extension wand expand your cleaning options, ensuring thorough coverage without risk.
- Lastly, regular maintenance tips from industry experts, available through trusted blogs, keep your tools performing at their best for years to come.
Your Turn to Trust the Power Washing Process
Embarking on your power washing adventure with the right knowledge and tools can truly transform your home’s exterior. Remember, it’s not about blasting away dirt at high pressure but applying skillful technique that preserves and enhances your surfaces. With patience and the right approach, your home will shine brighter and last longer.
What’s the biggest challenge you face when power washing your home? Drop your experiences below and let’s learn together!
,
Reading this post brought back my own early struggles with power washing. I still vividly remember how I thought that more pressure meant cleaner quicker, but I ended up damaging part of my siding. Since then, I’ve learned that patience, proper technique, and the right equipment make all the difference. What helped me was investing in a good variable nozzle kit and taking time to test on small areas first. I also found that setting realistic expectations—like working in small sections and maintaining a consistent distance—really improved my results. Has anyone else found that using a wide-angle nozzle, as opposed to a narrow jet, helps prevent accidental damage, especially on more delicate surfaces? I’d love to hear how others approach maintaining control during their cleaning process, because I think that’s where many people get into trouble.