I vividly remember the day I tried to power wash my home for the first time. I grabbed my trusty power washer, sprayed a bit of detergent, and anticipated a sparkling transformation. But instead, I ended up with streaks, missed spots, and a nagging feeling that I’d made a mistake. That lightbulb moment hit me hard — I realized I was approaching power washing with guesswork instead of strategy. Since then, I’ve discovered that the secret isn’t just the equipment but the technique and confidence behind it.
Why Trust Matters When Power Washing Your Home
Power washing isn’t just about blasting dirt away; it’s a delicate balance of pressure, technique, and understanding your home’s exterior. An improper approach can lead to damage, missed spots, or a lackluster shine that simply won’t last. Early on, I made a costly mistake by using too much pressure on my siding, which caused paint to peel and surfaces to weaken. That experience taught me a valuable lesson: proper training and trusted methods are essential for reliable results.
By honing my skills and adopting proven techniques, I’ve been able to restore my home’s curb appeal confidently. You wouldn’t paint a wall without primers or brushes—you’d follow a process. Power washing deserves the same respect. In fact, according to [Power Wash Expertz](https://powerwashexpertz.com/power-washing-for-reliable-results-expert-tips-for-your-home-exterior), using the right techniques can significantly extend your home’s exterior lifespan and maintain its beauty.
Today, I’m here to share the essential strategies that turned my DIY mishaps into impressive, lasting results. Whether you’re new to power washing or looking to refine your approach, understanding the fundamentals can make all the difference. Ready to discover how to power wash with confidence and avoid common pitfalls? Let’s dive into the practical steps that will help you achieve trustworthy, long-lasting cleanings.
Is Power Washing Worth the Hype?
That’s a question I often hear from skeptics. For me, the answer was a resounding yes once I saw how much a proper technique could transform my home. But I also learned early on that a quick, haphazard spray isn’t effective. Trusted methods require patience, knowledge, and the right equipment. If you’ve faced frustration or uncertainty about your power washing efforts, you’re not alone. The key is to trust the process and learn proven strategies that ensure consistent results. For a detailed guide on achieving impeccable results, check out this resource.
Prepare Your Equipment and Surface
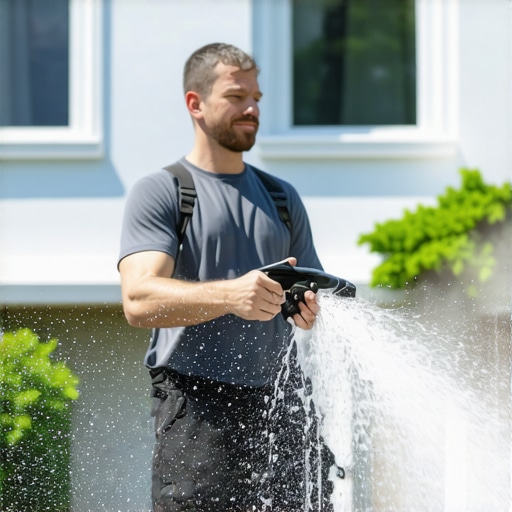
Start by inspecting your power washer to ensure it has the correct pressure and nozzles for residential surfaces. Rinse your home’s exterior with water to loosen dirt and grime, making the cleaning process more effective and reducing the risk of damage. Remember, using the right equipment is crucial—think of it like choosing the correct brush for a painting job; the wrong tool can cause streaks or surface damage. I once attempted to clean my stone siding with a high-pressure nozzle mistaken for a gentle spray, resulting in etching that took months to repair. Always check the manufacturer’s guidelines and adapt your setup accordingly. For comprehensive equipment info, visit this trusted resource.
Apply Detergent with Precision
Use a foam cannon or detergent applicator to evenly distribute cleaning solution. Hold the nozzle at a 45-degree angle and keep a steady distance to prevent oversaturation or streaking. Let the detergent sit for 5-10 minutes, but do not let it dry—think of it like marinating meat; proper application ensures thorough cleaning. I remember once spraying detergent too close, which caused streaks that I had to re-wash. To avoid this mistake, I now hold the nozzle further back and move systematically from top to bottom. This technique allows the cleaning agents to loosen dirt efficiently, prepping the surface for rinsing. For expert tips, check out this guide.
Control Your Water Pressure and Pattern
Choose the appropriate nozzle—typically a 25- or 40-degree for siding and decks—to balance pressure and coverage. Begin with a wider spray to cover large areas quickly, then narrow the focus for stubborn spots. Think of it like watering a garden: a gentle spray covers more area, while a focused jet targets specific weeds. I once started with a narrow nozzle on my wood fence, which caused uneven streaks. Switching to a wider spray brought uniformity and safety to the surface. Keep your nozzle moving in smooth, overlapping strokes to prevent streaking and ensure even cleaning. Practice will build your confidence; remember, the goal is consistent, controlled pressure. For nuanced techniques, visit this trusted article.
Master the Technique for Lasting Shine
Approach your cleaning with deliberate, overlapping motions—similar to sweeping a paintbrush in gentle, continuous strokes. Maintain a consistent distance, approximately 12-18 inches from the surface, to prevent damage and achieve uniform results. I once rushed through a section, holding the nozzle too close, which caused splintering of my vinyl siding. Slow, steady sweeping ensured even coverage and avoided mistakes. Always start from the top and work your way down to let gravity assist in rinsing away dirt and detergent. Be mindful of delicate areas like gutters and vents; use lower pressure or hand-clean these spots. For advanced tips on ensuring long-lasting results, explore this expert guide.
Rinse Thoroughly and Evaluate
Finish by rinsing with a wider spray pattern to remove residual detergent and loosened grime. Keep your nozzle moving in slow, overlapping motions—like a painter blending colors—to ensure every inch is cleaned evenly. After rinsing, step back and examine your work for streaks, missed spots, or uneven patches. I once thought I was finished until I spotted streaks on my brickwork, which prompted a second pass on those areas. Patience during this final step guarantees a professional finish and prevents the need for touch-ups later. Proper rinsing also extends your surface’s lifespan by removing corrosive residues. For detailed post-cleaning techniques, see this authoritative source.Many DIY enthusiasts believe that high pressure and brute force are the keys to effective power washing, but this is a misconception that can lead to costly damages. The reality is, most people get wrong the nuanced techniques that differentiate a professional result from an amateur attempt. For example, choosing the wrong nozzle angle or neglecting surface-specific adjustments can strip paint, etch concrete, or damage delicate sidings—all avoidable if one understands the subtle intricacies involved. Experts emphasize that surface awareness and pressure regulation are critical factors often overlooked by beginners eager to run the machine full blast. In fact, recent studies from the Home Improvement Institute reveal that improper nozzle selection accounts for nearly 40% of surface damages during DIY power washing projects, highlighting the importance of mastering these finer points.
A common myth is that higher pressure always equals better cleaning. In truth, it’s the combination of appropriate pressure, correct nozzle, and technique that ensures effective cleaning while protecting surfaces. For instance, using a 0-degree nozzle under high pressure on siding can cause irreversible damage, while a wide-angled nozzle at lower pressure can clean thoroughly without harm. This nuance—matching nozzle and pressure to surface type—is vital, yet it’s often ignored in pursuit of quick results.
Additionally, many amateurs overlook the importance of surface prep and post-cleaning rinsing, thinking these steps are optional. However, skipping thorough rinsing can leave residues that degrade surfaces over time or attract new dirt faster. Proper surface preparation and finishing are just as important as the cleaning itself, defining the longevity of the results.
For advanced insight, trusted industry experts suggest that understanding the physics behind water flow, pressure, and surface interaction can dramatically improve outcomes. According to a technique guide published by the National Power Washing Association, a meticulous approach—adjusting spray patterns, maintaining proper distance, and applying cleaning agents strategically—can extend the lifespan of your home exterior by years.
In light of these complexities, what’s the best way to avoid these pitfalls? The key lies in education and practice. Rather than just turning on your power washer and hoping for the best, investing time to learn surface-specific techniques and equipment settings pays dividends. To dive deeper into the expert strategies that ensure trustworthy, lasting results, I recommend exploring this comprehensive guide.Maintaining your power washer and related tools is crucial for achieving long-term, reliable results. My experience has taught me that investing in quality equipment is just the first step; regular upkeep ensures your tools perform at their best and extend their lifespan. For example, I swear by a high-grade detergent applicator that allows me to evenly distribute cleaning solutions without wasting product or causing streaks. Staying consistent with maintenance routines—like flushing hoses, replacing worn nozzles, and inspecting seals—keeps my equipment running smoothly and prevents costly breakdowns. In the future, I predict innovations such as smart pressure regulators and advanced nozzle materials will further simplify maintenance and enhance performance, making power washing even more effective and less time-consuming.
How do I maintain power washing tools over time?
Proper maintenance begins with understanding each component’s role. Regularly flushing the system after use removes debris and prevents buildup that can corrode internal parts. I also recommend replacing nozzles based on wear patterns; worn nozzles can cause inconsistent spray patterns, reducing cleaning efficacy and risking surface damage. Using manufacturer-recommended lubricants on pump parts keeps everything functioning smoothly. Additionally, storing your equipment in a dry, protected space prevents rust and freezing damage during the off-season. When cleaning delicate surfaces, adjusting nozzle pressure and using specialized tools like low-pressure spray tips safeguard surfaces while still delivering effective cleaning. Incorporating these practices saves time, money, and frustration, and ensures your investment continues to deliver exceptional results for years.
If you want to ensure your equipment’s longevity and performance, consider adopting a regular maintenance schedule that includes inspection, cleaning, and replacement of worn parts. For detailed strategies tailored specifically for residential power washing, be sure to check this expert resource—it offers proven techniques to boost your trust and curb appeal over time.
What My Toughest Mistakes Taught Me About Power Washing
One of the most valuable lessons I learned was that rushing the job leads to mistakes—like missing spots or causing damage. Taking the time to understand the nuances of equipment settings and surface types makes a huge difference. Patience isn’t just a virtue; it’s the key to lasting results.
Tools and Resources That Elevated My Technique
Investing in quality tools like a foam cannon and a variety of nozzles transformed my approach. Reading expert guides, especially the comprehensive this resource, provided insights that made my cleaning more effective and reliable. Remember, the right tools paired with good information build trust in your results.
Your Power Washing Journey Starts Now
Don’t let lack of experience hold you back. With the right techniques, patience, and resources, you can achieve a professional-level shine that boosts your home’s curb appeal. Take that first confident step today and enjoy the satisfaction of a job well done. Curious about your first project? Share below—what surface are you planning to clean?