Last summer, I stood in my front yard, staring at my limestone exterior, feeling a mix of frustration and helplessness. Despite countless attempts, my power washer seemed to leave tiny, unsightly pits in the stone. It was like watching my home’s beauty slowly erode before my eyes. That lightbulb moment made me realize: I was doing it all wrong.
Why Power Washing Limestone Can Feel Like Walking a Minefield
Power washing is an amazing way to give your home a fresh, clean look. But limestone? That delicate exteriorspecial stone, can turn into a pitted nightmare if you’re not cautious. In 2026, efforts to get that perfect clean without damaging or etching your limestone need to be based on proven, safe techniques. Trust me—I’ve been there, and I know how easy it is to fall into common traps that cause more harm than good.
What surprised me early on was how many homeowners waste time and money trying to blast away dirt only to end up with worse damage. The good news is, with the right approach, you can avoid this pitfall. Today, I want to share the four rules that transformed my limestone cleaning from an anxious chore into a confident, effective process. These rules are rooted in experience, research, and a dash of trial and error, so you don’t have to make the same rookie mistakes I did.
Is Power Washing Limestone Actually Worth the Hype?
One major mistake I made was thinking more pressure meant cleaner faster. Turns out, high pressure can etch limestone surface, causing irreversible damage. This misconception cost me costly repairs later. Interestingly, according to a study by the National Association of Home Builders, improper cleaning techniques can significantly reduce the lifespan of natural stone surfaces. That’s why mastering these four rules is critical—not just for beauty, but for your home’s longevity.
Now, I’m here to help you sidestep these pitfalls. If you’ve ever faced the horrifying sight of pitted limestone, you know exactly what I mean. The good news is, with a set of simple yet effective guidelines, you can restore your home’s exterior safely and brilliantly. Ready to get started? Let’s dive into the four essential rules that will keep your limestone pristine without risking damage or loss of character.
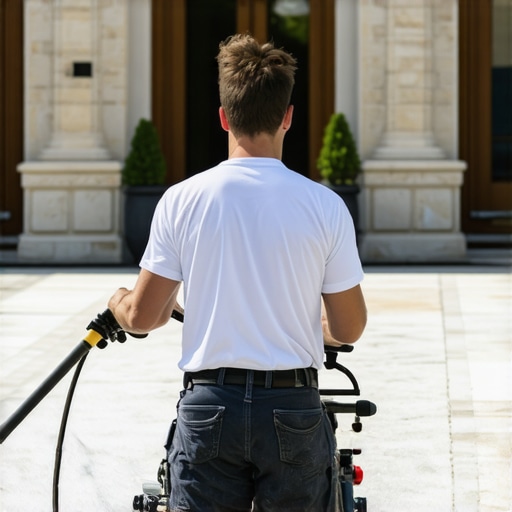
Choose the Right Equipment and Settings
Start by selecting a pressure washer that offers adjustable PSI—aim for 1,500 to 2,000 PSI specifically for limestone to avoid etching. Use a wide-angle nozzle, such as a 25 or 40-degree tip, which disperses water gently over the surface. Remember, higher pressure isn’t always better; it’s about control. When I cleaned my own limestone porch, I found setting the pressure at the lower end and using a wider spray helped prevent damage and deliver a thorough clean without risk. For detailed guidance, check out these pressure rules.
Prep the Surface and Gather Supplies
Before spraying, remove any loose debris using a leaf blower or broom. Cover nearby plants with plastic sheeting to prevent water damage, and ensure the area is free of ornaments and furniture. Applying a limestone-safe detergent with a low-pressure spray can loosen dirt effectively—think of it as giving your stone a gentle scrub rather than a high-pressure blast. I once made the mistake of skipping this step, which led to muddy streaks; now I always pre-treat for better results. For tips on cleaning around delicate areas, see window cleaning tips.
Master the Technique for Safe Cleaning
Hold the spray wand at a 45-degree angle and keep it about a foot away from the surface. Use smooth, overlapping strokes—think of painting a wall with a roller but with water. Never aim the nozzle straight at the limestone to prevent concentrated high-pressure spots that can etch or chip. When I tackled my stone walls, I moved in slow, deliberate motions, maintaining consistent distance and pressure. This method ensures even cleaning and avoids hotspots. For specific advice on wading around fragile edges, refer to porch cleaning techniques.
Use Detergents Sparingly and Effectively
Apply a limestone-compatible cleaning solution using a low-pressure setting, focusing on heavily soiled areas. Let it sit for about 5–10 minutes—don’t let it dry completely—and then rinse thoroughly. This pre-treatment helps lift stubborn dirt without aggressive scrubbing. When I did my first project, I used too much detergent, which caused residue and streaks; now I dilute and apply with precision, resulting in a uniform shine. If you’re unsure about suitable cleaning agents, see detergent application tips.
Guard Against Common Mistakes
Always test a small, inconspicuous area first—it’s like a patch test for beauty products but for cleaning surfaces. Avoid circling the wand wildly; instead, move methodically to cover all sections evenly. Keep the nozzle moving to prevent edge etching or water pooling. I learned this by doing a patch test on an unseen corner—what looked fine turned out to be problematic when scaled up. For more on avoiding common pitfalls, review stripe prevention techniques.
Final Rinse and Inspection
After cleaning, switch to a pure water rinse to remove residual detergent and dirt. Check the surface for missed spots or streaks—if necessary, repeat the process softly. A clean limestone surface should look evenly matte with no shiny patches or deep pits. When I finished my own project, I took a step back and examined the result under sunlight—accuracy in rinsing made all the difference for a professional finish. For tips on achieving streak-free results, see streak-free techniques.
Many homeowners assume that increasing pressure is the key to a spotless surface, but in reality, this misconception often leads to costly damage. For example, cranking up the PSI beyond recommended levels can etch into delicate limestone or soft siding, causing permanent harm. Expert sources, such as industry-specific research, emphasize the importance of understanding the nuance that sometimes, less pressure yields better results, especially on fragile materials. Another widespread myth is that using harsh chemicals is necessary for stubborn stains; however, gentle, limestone-compatible detergents, applied correctly, can tackle dirt effectively without risking etching or discoloration. This approach aligns with the principle that proper technique and equipment settings are integral to achieving lasting, safe results. One common mistake is neglecting the importance of pre-treatment, which can lead to uneven cleaning or streaks, particularly on textured surfaces. Mastering these details distinguishes experienced power washers from amateurs—it’s about finesse, not just force. Advanced techniques include adjusting nozzle angles and distances to minimize edge damage, or utilizing specific nozzles designed for brick or stone, ensuring a thorough clean without compromising structural integrity. Curious about the finer points? For high-level strategies, visit our detailed guide on pressure settings that prevent etching. Remember, rushing the process or following generic advice can be a recipe for disaster. Instead, invest in understanding the subtle nuances that professionals rely on, paving the way for safe and effective power washing. Have you ever fallen into this trap? Let me know in the comments.
How Do I Keep My Power Washing Equipment in Top Shape?
Maintaining your power washer is critical to ensure consistent results and extend its lifespan. Regularly inspecting hoses and nozzles for signs of wear, cracks, or clogs helps prevent unexpected breakdowns. I personally schedule a thorough cleaning of the filter and an oil check before each busy season—this proactive approach has saved me from costly repairs. Additionally, draining the system after use, especially in winter, guards against freezing damage and corrosion. Investing in a quality portable pump that features durable seals and corrosion-resistant materials ensures longevity, especially if you often clean in challenging conditions.
My preferred maintenance routine involves a quick oil change and lubricant application following the manufacturer’s guidelines, which I’ve found dramatically reduces wear. Using manufacturer-specific maintenance kits simplifies the process and guarantees compatibility. Moreover, reading the latest industry updates from reputable sources, like the Power Washing Expert Blog, keeps me updated on evolving practices and new equipment models. Regular upkeep not only prevents breakdowns but also ensures your equipment operates at peak pressure, making your cleaning more effective.
Tools I Recommend for Reliable, Efficient Power Washing
I swear by adjustable, high-quality nozzles, because they give me precise control over pressure and spray pattern. My go-to is the multi-angle nozzle, which allows quick switching between cleaning delicate surfaces and stubborn stains without changing equipment. A robust extension wand is invaluable for reaching high or tricky spots safely, reducing the need for ladders. For stubborn dirt, I use a compatible, eco-friendly detergent supplied through a foam cannon attached to the system, ensuring even application and minimizing waste.
To keep everything running smoothly, I rely on tools like a pressure gauge to monitor PSI in real-time, preventing damage from over-pressurization. Additionally, investing in a quick-connect hose system saves me valuable time switching between tasks. As the trend moves toward more eco-friendly and quieter models, I am excited about emerging tools that combine power with sustainability, like battery-powered units that outperform traditional gas models.
To ensure long-term performance, I follow a simple principle: perform maintenance after every major project, check for leaks, and store equipment in a dry, temperature-controlled space. In the future, I predict that automatic diagnostic tools integrated into power washers—like smartphone apps that monitor wear and suggest repairs—will become standard, simplifying maintenance further. For now, I encourage you to try aligning your routine with these expert-backed tips—such as inspecting hoses before each use—and experience the difference it makes in your results and equipment lifespan. Proper upkeep is the silent key to exceptional cleaning every time.
What I Wish I Knew When Starting Out
One of the hardest lessons I learned was that more pressure isn’t always better. I initially believed crankling up the PSI would clear grime faster, but I soon realized it meant risking damaging my limestone. That lightbulb moment taught me to prioritize control and technique over brute force. Additionally, I underestimated the power of pre-treatment; applying a gentle, limestone-safe detergent before the rinse made all the difference in achieving an even clean. Needing to learn these lessons the hard way made me appreciate the importance of patience and understanding in power washing delicate surfaces.
Another insight was how crucial equipment settings are. A well-adjusted PSI and a wide spray nozzle can prevent etching and surface damage—cutting my cleaning time while boosting results. Finally, I discovered that ongoing maintenance of my power washer, like checking hoses and nozzles regularly, ensures consistent pressure and extends its lifespan. These behind-the-scenes tweaks, often overlooked, are what truly elevate your power washing game.
Tools and Resources That Made a Difference
I rely heavily on adjustable nozzles that give me precise control, especially when tackling limestone walls and delicate edges. Their versatility allows me to switch from gentle rinses to more aggressive scrubbing without risking damage. A quality extension wand has become my go-to tool for reaching high and tricky spots safely, eliminating the need for ladders and reducing risk. For expert tips and tutorials, I trust resources like the pressure rules guide and technique-specific articles, which have helped shape my approach.
Furthermore, I recommend investing in a reliable pressure gauge to monitor PSI during each session. This simple tool prevents over-pressurizing that could harm your limestone. When it comes to detergents, choosing environmentally friendly, limestone-compatible solutions ensures safety for your exterior and landscaping. These tools, combined with regular maintenance routines outlined in trusted blogs, keep my equipment performing at its best, resulting in consistently clean and undamaged surfaces.
Taking Action with Confidence Starts Today
Your home’s limestone exterior deserves the best care, and every power washing session is an opportunity to refine your technique and expand your skills. Remember, mastering the art of safe, effective power washing isn’t just about cleaning—it’s about preserving your home’s character while enhancing curb appeal. Dive into the detailed guides and trusted tools available, and don’t be afraid to practice on inconspicuous spots first. With patience and the right approach, you’ll be proud of results that last for years to come. Now, take that first step—your beautifully restored limestone awaits!
What step in your power washing routine do you find most challenging? Let me know below and share your experiences!
.