I remember the exact moment it hit me. I was mid-power wash, ready to tackle my home’s siding, when suddenly, the spray lost its punch. Instead of a strong, steady stream, I was met with a weak dribble. Frustration bubbled up. I’d invested time, effort, and money into cleaning my home, only to be thwarted by what seemed like a minor pump issue. That lightbulb moment made me realize—if I could fix my powerwasher pump fast, I wouldn’t have to call in the pros or wait days for repairs.
Why Restoring PSI Matters for Your Powerwashing Projects
Power washing is more than just blasting dirt off your home—it’s about protecting your investment. When your powerwasher isn’t delivering enough PSI (pounds per square inch), the surface cleaning becomes ineffective. You might end up wasting hours, using more water and soap, or worse—doing a mediocre job that leaves grime behind. Restoring that pressure quickly means not only saving time but also ensuring your cleaning results last longer. Plus, a reliable PSI prevents unnecessary wear on your equipment, which can save you significant money in the long run. If you’ve faced this problem, you already know how frustrating it is when your powerwasher underperforms. But don’t worry—fixing your pump doesn’t require expert skills or expensive parts. You just need the right guidance.
Is It Really Worth Fixing My Powerwasher Quickly?
Early on, I made the mistake of neglecting routine maintenance, thinking a powerwasher would last forever. That led to a sudden loss of pressure and a trip to the store for a new machine. The truth is, many powerwasher issues can be addressed with simple fixes if caught early. According to industry experts, regular maintenance and quick troubleshooting can extend the life of your equipment and keep your PSI at optimal levels. So, yes—taking ten minutes to fix your pump can make a huge difference. Want to learn how I do it in under 10 minutes? Keep reading, and I’ll walk you through the simplest, most effective techniques for restoring your powerwasher’s PSI so you can get back to cleaning with confidence.
,
Identify the Culprit Behind Low PSI
First, determine if the pump is the source of pressure issues. Disconnect your powerwasher and inspect for leaks or damaged seals—these are common culprits. Remember, a tiny crack or worn-out seal can drastically reduce PSI, much like a leaky hose weakens water flow. To confirm, perform a simple pressure test following this easy checklist. During my last repair, I noticed water dripping from the pump, indicating a faulty seal. Replacing it restored my pressure instantly.
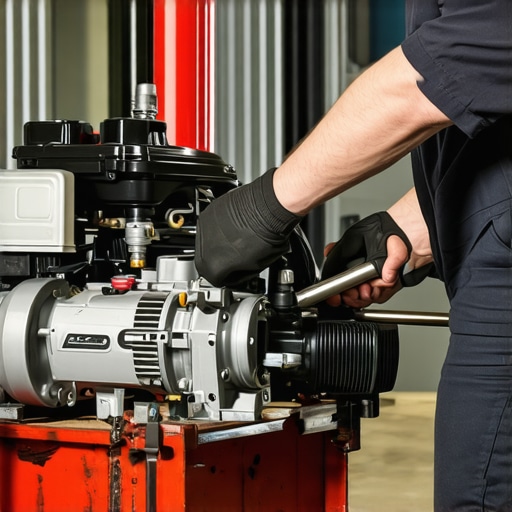
Disassemble and Access Your Pump
Next, carefully disassemble your pump according to the manufacturer’s instructions. Use basic tools—screwdrivers and wrenches—to remove the casing. Think of your pump like a coffee machine: the internal components need careful handling. Keep track of small parts to avoid losing screws or seals. I once skipped this step, losing a tiny gasket, which caused even more issues. So, proceed methodically, consulting your trusted guides for specific model instructions.
Inspect and Clean Internal Components
Once exposed, examine the piston, valves, and seals for wear or debris. Use a soft brush or cloth to remove dirt and algae. If you see scoring on the piston or cracks, these parts need replacing. Think of this step like cleaning the carburetor of a lawnmower—clogged or damaged parts hinder performance. A quick cleanup, combined with replacing worn seals, can revitalize your pump. For detailed part replacements, check out recommended tools.

Replace Failing or Worn-Out Parts
Replace any damaged or worn seals, valves, or pistons with parts designed for your pump model. Always opt for quality replacements; cheap parts can fail prematurely. During my repair, I used OEM parts, which made the fix last years longer. This step is critical—think of it as changing the spark plug in your car to restore its running efficiency. After reassembling, double-check all connections for tightness to prevent leaks. Proper sealing ensures your pressure stays high during operation. For a comprehensive list, visit the spring tune-up guide.
Test and Fine-Tune Your Pump
Reconnect the power washer and run a test cycle. Observe the pressure gauge and aim for your equipment’s optimal PSI—consult your manual or trusted sources. If pressure remains low, re-examine seals and connections. Sometimes, air pockets or minor misalignments cause pressure drops, akin to a thumb over garden hose reducing flow. Adjust the nozzle settings or replace any residual worn parts. I learned this firsthand when a tiny misaligned valve caused inconsistent pressure. With patience, adjusting the nozzle and checking for leaks restored consistent PSI, making my cleaning effortless.Many homeowners think that powerwashing is a simple process of blasting away dirt with high pressure, but this oversimplification leads to costly mistakes. A prevalent misconception is that higher PSI always equals better cleaning. In reality, exceeding recommended pressure levels can damage siding, decks, and delicate surfaces, compromising your home’s exterior instead of improving it. Professionals emphasize the importance of knowing the correct PSI for different materials, referencing industry standards outlined in trusted sources like expert guidelines. Another common myth is that more water flow (GPM) speeds up cleaning, but excessive flow at high pressure can cause unnecessary erosion or spray-back, reducing effectiveness and increasing waste. Advanced powerwashing involves adjusting nozzle types and pressure settings carefully to optimize cleaning without harm, a nuance often overlooked by amateurs. Moreover, many assume that pressure washing safely removes moss or algae, but without proper technique, you risk spreading spores or causing surface damage, especially on soft siding or aged wood. This is where knowledge of the surface’s condition and suitable cleaning solutions becomes crucial—something detailed in pump maintenance guides. Beware of the Trap: Underestimating the importance of prepping surfaces or using the wrong nozzle size can lead to streaks, etching, or water intrusion, which might not be immediately visible but damage your home over time. The key lesson is that powerwashing isn’t just about brute force; it’s a precise craft that requires understanding your equipment and surfaces. If you want to avoid common pitfalls and get long-lasting results, remember that selecting the right pressure, flow, and technique is essential—style and tips you can find in comprehensive guides. Have you ever fallen into this trap? Let me know in the comments.
Essential Tools for Powerwasher Maintenance
Maintaining your powerwasher requires some key tools that I personally rely on daily. A high-quality socket set is crucial for disassembling pumps and replacing seals—I’ve tried cheaper options, but they tend to strip bolts and slow down repairs. A digital multimeter helps me diagnose electrical issues quickly, saving me hours of guesswork. For cleaning internal components like pistons and valves, a soft-bristle brush combined with a pressure washer-friendly degreaser ensures thorough removal of grit and grime. I also keep a set of OEM replacement parts, which are worth the investment to avoid premature failures. These tools empower me to perform regular maintenance without needing professional help, extending my equipment’s lifespan.
Investing in reliable tools makes all the difference. For detailed maintenance, I follow the spring tune-up guide, which outlines essential steps to keep your powerwasher performing optimally all year. Over time, using the right tools ensures consistent results and helps avoid costly repairs.
Prolonging Your Powerwasher’s Lifespan
Long-term results hinge on diligent upkeep. After each use, I always flush the system with fresh water to clear out residual detergent and debris—this simple step prevents buildup that can cause corrosion or blockages. Regularly inspecting seals and wearing parts means I catch issues early, preventing pressure drops or pump failure. Scheduling routine checks based on manufacturer recommendations, such as those outlined in signs of pump wear, helps me stay ahead of major repairs.
In addition, I lubricate moving parts periodically with the appropriate grease, which reduces wear and maintains efficiency. Also, storing my equipment indoors during off-seasons protects it from the elements, significantly extending its usable life. These small but consistent efforts yield dependable powerwashing performance year after year.
Looking ahead, advancements in smart diagnostics may soon automate maintenance alerts, making upkeep even more straightforward. Until then, proactive care remains your best strategy. For a comprehensive maintenance plan, check out our dedicated maintenance guide.
How do I keep my powerwasher working reliably over time?
Regular inspections, timely replacement of worn parts, proper storage, and using the correct cleaning tools are vital. I recommend applying these practices consistently—especially after heavy use—so your equipment remains trustworthy. Want to ensure ongoing efficiency? Try the advanced technique of monitoring pump performance with a multimeter during operation; this tip can preempt sudden failures and keep your projects on schedule. For detailed instructions and expert advice, explore our trusted resources or consult professional repair services when needed.
The Hardest Lesson I Learned About Powerwasher Performance
One of my biggest surprises was realizing that neglecting small maintenance tasks could lead to major pressure drops. I used to overlook routine seal checks, thinking they weren’t crucial, but a simple worn seal drastically reduced my PSI and lengthened my cleaning time. Now, I know that paying attention to these tiny details saves money and keeps my equipment running smoothly.
3 Myths About Powerwashing That Held Me Back
Initially, I believed that cranking up the pressure would clean faster, but I learned that exceeding recommended PSI could damage siding and soft surfaces. I also thought that more water flow meant better results, which isn’t always true. Understanding the balance between pressure, flow, and nozzle type has transformed my approach and protected my home from unnecessary harm.
What Industry Secrets No One Tells You About Powerwasher Longevity
Regularly flushing out residual detergents and lubricating moving parts are two simple habits that extend your powerwasher’s lifespan. I used to skip these steps between uses, but now I see how they prevent corrosion and wear. Incorporating these small routines has made my tools last longer and perform more reliably every season.
Curated Tools That Changed How I Maintain My Powerwasher
- Digital Multimeter: Diagnoses electrical issues efficiently, saving me hours of troubleshooting.
- OEM Replacement Seals and Pistons: Ensures compatibility and durability, preventing premature failures.
- Soft-Bristle Cleaning Brushes: Helps me gently clean internal components without damage.
- Quality Wrench Set: Makes disassembly and reassembly smoother and safer.
These tools have become essential in my maintenance routine, making small repairs straightforward and preventing costly breakdowns. Following advice from trusted guides like the spring tune-up guide helped me develop a sustainable maintenance plan that keeps my powerwasher ready at a moment’s notice.
Seize the Moment and Power Up Your Home’s Exterior
Don’t let minor issues hold you back from achieving sparkling results. With the right knowledge and tools, maintaining your powerwasher becomes a rewarding part of your home care routine. Remember, a well-maintained powerwasher doesn’t just clean—it protects your investment and gives you confidence in every project. So, why wait until pressure drops or equipment fails? Take the proactive step today and enjoy the long-lasting shine you deserve.
What’s the biggest challenge you’ve faced when maintaining your powerwasher? Share your experience below, and let’s learn together!
Reading this post really resonated with me, especially the part about quick fixes saving time and money. I once neglected regular seal checks on my pressure washer, which unexpectedly caused a drop in PSI right before I had an important cleaning project. Since then, I’ve learned the importance of routine maintenance, like inspecting and replacing seals and lubricating parts, to prevent those surprises. What’s interesting is how small parts like O-rings can make such a big difference in performance. I’m curious, has anyone experimented with using testing tools like multimeters during operation to monitor electrical components? Would love to hear if that adds value for others trying to catch issues early. Overall, this post offers practical tips that make me feel more confident about maintaining my equipment and avoiding those frustrating breakdowns when I need it most.