Have you ever stood back after a power washing session and felt that mix of satisfaction and frustration? I remember the first time I tackled my own home’s exterior. I was eager to see that bright, fresh look, but instead, I ended up with streaks, missed spots, and a lingering doubt about whether I’d actually done it right. That lightbulb moment taught me a crucial lesson: power washing isn’t just about blasting dirt away. It’s about knowing the right techniques to ensure long-lasting, trustworthy results.
Why Reliable Power Washing Matters More Than Ever
In today’s market, a clean home exterior isn’t just about curb appeal; it’s about protecting your investment. Regular power washing can extend the life of your siding, brick, or wood, and keep your home looking its best for years to come. But here’s the kicker: many homeowners jump in without proper knowledge, only to find their efforts short-lived or even damaging. That’s where proven strategies come into play. I’ve learned from my mistakes and those of others, and I want to help you avoid the common pitfalls that can turn a simple cleaning into a costly repair.
Is Power Washing Really Worth the Hype?
Let me be honest. Early on, I believed that more pressure meant better cleaning. Turns out, I was wrong. I once used a pressure setting that was way too high on my siding, and I ended up with gouges and streaks. That mistake cost me time, money, and the trust in my own skills. Over time, I discovered that effective power washing isn’t about brute force but about precision, technique, and understanding your surfaces. You can find trusted tips and techniques that will help you get results you can trust by exploring resources like this guide.
So, if you’ve faced the same doubts or fears about whether your DIY efforts will last, don’t worry. I’ve been there, and I’ve learned how to do it right. In the upcoming sections, I’ll share the proven strategies that will help you achieve reliable, lasting results—no gimmicks, just real techniques that work. Ready to transform your home’s exterior with confidence? Let’s dive into the secrets of professional-grade power washing that you can trust.
Choose the Right Equipment for Precise Results
Start with selecting a power washer that matches your home’s surface needs. Think of it like choosing the right paintbrush; a too-powerful unit can gouge soft siding, while a too-weak one may struggle to remove grime. I once used a high-pressure setting on my wood deck, which left streaks and splinters. After that, I switched to a machine with adjustable pressure and learned to set it just right, ensuring effective cleaning without damage. For detailed guidance, check out this trusted resource.
Master the Technique of Consistent, Overlapping Passes
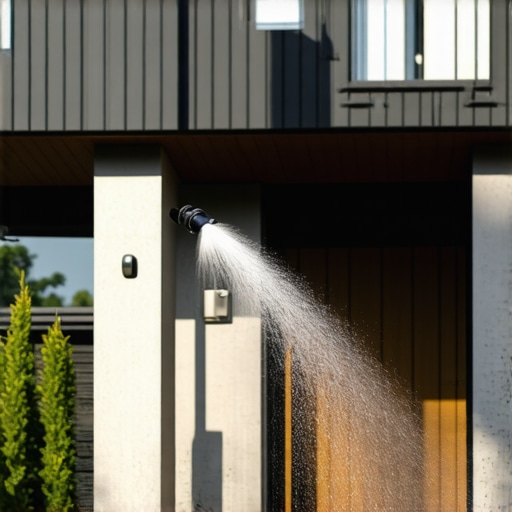
Moving the spray wand smoothly and overlapping each pass prevents missed spots and streaks. I remember aiming the nozzle at a stubborn corner of my house, carefully overlapping each stroke to avoid streaks. It’s similar to painting a wall—consistent, overlapping strokes produce an even, professional finish. Keep the spray at a 45-degree angle and maintain a steady distance—about 12-18 inches from the surface. This approach guarantees cleaner, more uniform results and preserves your home’s integrity. For more expert tips, visit this guide.
Use the Correct Nozzle and Adjust Pressure for Different Surfaces
Different surfaces need different nozzles and pressure levels. Soft siding like vinyl benefits from a wide-angle (25-degree) nozzle set at a lower pressure, while concrete patios can handle a 15-degree nozzle at higher pressure. I once tried to clean my brick driveway with a narrow nozzle and too much pressure, which caused chips. Learning to switch nozzles and adjust the pressure saved me from costly repairs. Remember, always start with the lowest pressure and increase gradually. For detailed surface-specific techniques, consult this trusted resource.
Maintain Proper Technique to Avoid Damage
Hold the wand steadily, keeping it at a consistent angle and distance. I once became impatient and held the wand too close, which resulted in streaks and even gouges. Practicing proper handling—steady, perpendicular strokes—ensures even cleaning and prevents surface damage. Think of it like ironing: a steady hand and correct distance create a smooth finish. Use gentle, sweeping motions and never point the nozzle directly at seams or edges. For more on safe techniques, visit this expert guide.
Rinse and Final Check for Lasting Results
Always rinse thoroughly to remove soap, dirt, and residual grime. After rinsing, walk around your home to inspect for missed spots or streaks. I once missed a corner near my gutter, which became noticeable after drying. A quick re-spray solved the issue, reinforcing the importance of a final walk-through. Proper rinsing and inspection ensure your work lasts longer and looks professional. For additional finishing tips, explore this comprehensive guide.
When it comes to power washing your home, many homeowners operate under misconceptions that can lead to subpar results or even damage. As someone who has been immersed in the intricacies of professional-grade power washing techniques, I want to share some of the hidden nuances that often go unnoticed. Understanding these can make a significant difference in your approach and outcomes.
Why the Pressure Myth Can Cost You
One of the most widespread myths is that higher pressure always equals better cleaning. This misconception can tempt many to crank up the pressure setting, but in reality, it often results in surface damage, especially on softer materials like vinyl siding or wood. I’ve seen homeowners gouge their siding because they believed more force was the answer. The truth is, effective power washing relies heavily on the right pressure, not the maximum pressure. A study by the expert community highlights that setting the pressure appropriately based on surface type is crucial for both safety and longevity.
Common Mistakes That Lead to Hidden Damage
Another trap is neglecting to consider the surface’s age and condition before washing. Older or weathered surfaces may be more fragile, and using aggressive techniques can strip paint, erode materials, or cause leaks. I once learned this the hard way when rushing through a job and using the same technique on a delicate stucco wall as I did on a concrete driveway. The result? Cracks and discoloration. Always tailor your approach to the specific surface, and don’t assume that what works on concrete will be safe for wood or vinyl. For advanced tips on surface-specific techniques, check out this guide.
Ever Wondered Why Technique Matters More Than Power?
Many think that the key to a sparkling clean home is brute force, but in my experience, technique is king. Proper overlapping passes, correct nozzle selection, and maintaining the right distance from surfaces are what produce lasting, trustworthy results. Rushing or rushing through the process often leads to streaks, missed spots, or surface damage. It’s about finesse, not just force. For those ready to elevate their skills, I recommend exploring this resource for expert insights.
Have you ever fallen into this trap? Let me know in the comments. Remember, power washing is as much about precision as it is about pressure, and understanding these nuances will help you achieve results you can truly trust.
Keeping your power washing equipment in top shape is crucial for achieving consistent, professional results over time. I personally rely on a few key tools and maintenance routines that ensure my power washer performs reliably and lasts for years. Regular upkeep not only extends the lifespan of your equipment but also keeps your cleaning results sharp and effective. In this section, I’ll share the tools I recommend and the maintenance habits that make all the difference.
Invest in a Quality Surface Cleaner
One of the best investments I made was a dedicated surface cleaner attachment. Unlike traditional spray wands, a surface cleaner provides even pressure distribution and helps prevent streaks and missed spots. I personally prefer models with rotating brushes and adjustable pressure settings because they give me better control, especially on large patios or decks. Using a surface cleaner saves time and results in a more uniform finish, which is essential for trustworthy results. For consistent outcomes, I recommend choosing a reliable brand known for durability, like Simpson or Karcher.
Pick Up a Set of Nozzles
A versatile set of nozzles is vital for adapting to different surfaces. I keep a handful of nozzles with varying spray angles—ranging from 15° for tough concrete stains to 25° for gentle siding cleaning. Having quick access to these nozzles allows me to switch seamlessly and avoid surface damage. Remember, always start with the widest angle and work your way down to more focused jets; this approach minimizes the risk of gouging delicate surfaces. For precise control, I also recommend a nozzle with an adjustable spray pattern, which I’ve found invaluable for detailed work.
Maintain Your Equipment Regularly
Routine maintenance is the secret to long-term reliability. I recommend flushing the system after each use to clear out debris, inspecting hoses and fittings for leaks, and lubricating moving parts periodically. Additionally, I always check the pump oil level and replace it as recommended in the manufacturer’s manual—this prevents unnecessary wear and tear. Keeping the filters clean ensures optimal water flow and prevents clogs. A well-maintained power washer not only performs better but also reduces the likelihood of costly repairs down the line. For detailed maintenance routines, check out this trusted resource.
Use Proper Storage Methods
Proper storage is often overlooked but is essential for long-term equipment health. I always disconnect hoses, drain any remaining water from the system, and store my power washer in a dry, sheltered space. During off-season months, I add a fuel stabilizer to my gas-powered units to prevent gum build-up and perform a thorough cleaning of all filters and nozzles. These small steps prevent corrosion and ensure my equipment is ready to go when I need it again.
Predicting Future Trends in Power Washing Tools
Looking ahead, I believe the trend toward smarter, more connected power washing tools will continue. Features like app-controlled pressure settings, real-time diagnostics, and eco-friendly operation are likely to become standard. Investing in versatile, durable equipment now positions you well for future innovations that will make the process even more reliable and efficient. To stay ahead, keep an eye on industry leaders and emerging tech—and don’t hesitate to try advanced accessories like heated nozzles or eco-friendly detergents that can further enhance your results.
How do I maintain my power washing tools over time?
Consistency is key. Regularly inspect hoses and fittings for wear, clean filters after each use, and store your equipment properly to prevent corrosion. Follow manufacturer guidelines for oil changes and part replacements, and always use the right nozzles and pressure settings for each surface. These simple but effective habits will ensure your tools remain trustworthy and effective for years. For more in-depth advice, visit this guide.
By investing in quality tools and maintaining them diligently, you’ll not only achieve better results but also save money in the long run. Give one of these advanced tips a try today, and see how your power washing game improves dramatically.
What I Wish I Knew About Power Washing That Changed Everything
- Discovering that more pressure isn’t always better was a game-changer; it’s about technique, not force. I learned this after gouging my siding and realizing the importance of adjusting pressure based on surface.
- My biggest breakthrough came when I started using the right nozzle for each surface. Switching from a narrow 15-degree to a wider 25-degree nozzle prevented damage and improved my results significantly.
- Practicing steady, overlapping strokes made my cleaning more uniform and professional-looking. Rushing leads to streaks and missed spots, a lesson I’ve internalized after several imperfect attempts.
- Maintaining equipment regularly—cleaning filters, checking hoses, and proper storage—keeps my power washer reliable and ready to deliver trustworthy results every time.
- Finally, understanding that surface condition matters most—delicate stucco or weathered wood require gentle touch—helped me avoid costly repairs and achieve long-lasting cleanliness.
My Go-To Tools for Power Washing Success
- Surface Cleaner Attachments: These tools distribute pressure evenly and save time, providing a consistent, streak-free finish. I trust models from Simpson and Karcher for durability and performance.
- Versatile Nozzle Set: A collection of nozzles with varying spray angles (15°, 25°, etc.) allows me to adapt to different surfaces effortlessly, ensuring safe, effective cleaning.
- Routine Maintenance Supplies: Regularly replacing pump oil, cleaning filters, and inspecting hoses keeps my equipment in top shape. Following manufacturer guidelines is key to longevity.
- Proper Storage Solutions: Draining water and storing my power washer in a dry space prevents corrosion and prepares it for long-term use, especially during off-seasons.
Believe in Your Power Washing Journey
Embarking on power washing might seem daunting at first, but with the right techniques and tools, you can achieve results you’ll trust. Every streak, missed spot, or surface mishap is just a lesson in disguise—bringing you closer to mastery. Remember, the secret lies not just in the equipment but in your approach. Keep learning, stay patient, and let your confidence grow with each project. Your home’s exterior is waiting for that professional shine—go ahead, give it your best shot today!
What’s your biggest challenge when power washing? Share your experiences below—I’d love to hear your story and help you overcome it!